 |  Ah! The shine! The glimmer! Reminds me of Christmas! |
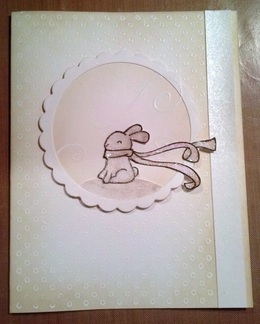
This is my second entry for the white on white challenge hosted by Lawnscaping. I wanted to use the stamp that I have in a different way than was intended. Originally, he is on a sled, but I thought it would be cute to have him just sitting in the snow. Yay for more uses with one stamp! That's one thing I like about these challenges. It makes you rethink how to use what supplies you have. I'm all for that!
This card was easy enough to make. I started with the background by prepping the surface with my anti-static "tool" and heat embossed in white. Now, to add some contrast, I sponged some Antique Linen over the edges to really make the embossing pop. For the strip of shimmery cardstock on the right, I had sprayed a mixture of Perfect Pearls and water, let dry, then cut into strips and glued one into place. Simple, right? The background stamp that I used didn't fit the full A2 sized card, so I had to be creative with embellishing, because I didn't want to cut off the edge. I think next time I would also punch a design into that strip, but for this card, I was keeping it simple.
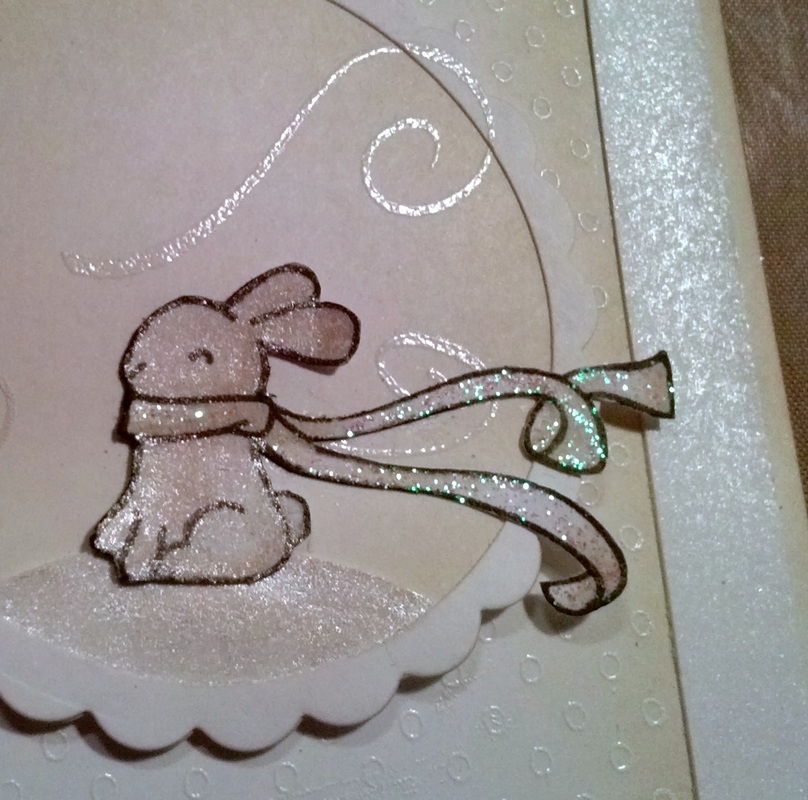
For the top panel, I freehand cut a snow bank, then die cut them into a scallop shape on one side. I die cut a simple scallop and sponged that with Antique Linen around the edges and glued the snow bank into place. I layered a scallop die with a slightly smaller circle die for the frame. I glued the frame on, and then heat set everything before my next step. I didn't want the Antique Linen to be at all wet, and accidentally emboss there. So heat setting was just a precaution. I stamped some wind swirls and heat embossed those.
For the bunny, after fussy cutting him out, I drew along the edges with a black Pitt pen (brush tip) to make him look nicely finished. Often, I forget to do this step, and it doesn't bother me too much, but edging it DOES make it look nicer. After fussy cutting, I normally just want to move on! Since this is a simple card, the details really matter, so I did edge it. Make sure you use ink that won't bleed when you color the image. Pitt pens are waterproof, so that's what I used. Or you can color first, then edge it, if the ink bleeding is a concern for you. I colored him with some Antique Linen and a little water, just along where the shadows would be. I popped this scalloped circle on foam adhesive for dimension.
I finished the card off with a little Perfect Pearls mixed with water (I don't have a Wink of Stella, which would work here too) painted over the bunny and snow bank. For his scarf, I added some Holographic Clear Stickles. And that's that! Pretty clean and simple, if you ask me!
Products I Used: | (listed below) |
Also used these products:
Stamps: Heidi Grace Designs Polka Dot Background
Dies: Sizzix: Scallop Circles, Circles
Embellishments: Holographic Stickles (with a green/blue/pink tint)
Stamps: Heidi Grace Designs Polka Dot Background
Dies: Sizzix: Scallop Circles, Circles
Embellishments: Holographic Stickles (with a green/blue/pink tint)
